Switching to iPhone: Part 1

I have used Android phones since the first one: the G1. I’m one of the (relatively) few people who has used Android 1.0. I’ve had numerous Android phones since then, mostly the Google flagship.

I have fond memories of the Nexus One and Galaxy Nexus, as well as a bunch of time running Cyanogen (often daily builds, because YOLO) to get more privacy preserving features (or a more recent Android). I had a Sony Z1 Compact for a while which was great bang for buck except for the fact the screen broke whenever you looked at it sideways. Great kudos to the Sony team for being so friendly to custom firmware loads.

I buy my hardware from physical stores. Why? Well, it means that the NSA and others get to spend extra effort to insert hardware modifications (backdoors), as well as the benefit of having a place to go to/set the ACCC on to get my rights under Australian Consumer Law.

My phone before last was a Nexus 5X. There were a lot of good things about this phone; the promise of fast charging via USB-C was one, as was the ever improving performance of the hardware and Android itself. Well… it just got progressively slower, and slower, and slower – as if it was designed to get near unusable by the time of the next Google phone announcement.

Inevitably, my 5X succumbed to the manufacturing defect that resulted in a boot loop. It would start booting, and then spontaneously reboot, in a loop, forever. The remedy? Replace it under warranty! That would take weeks, which isn’t a suitable timeframe in this day and age to be without a phone, so I mulled over buying a Google Pixel or my first ever iPhone (my iPhone owning friends assured me that if such a thing happens with an iPhone that Apple would have swapped it on the spot). Not wanting to give up a lot of the personal freedom that comes with the Android world, I spent the $100 more to get the Pixel, acutely aware that having a phone was now a near $1000/year habit.

The Google Pixel was a fantastic phone (except the price, they should have matched the iPhone price). The camera was the first phone camera I actually went “wow, I’m impressed” over. The eye-watering $279 to replace a cracked screen, the still eye-watering cost of USB-C cables, and the seat to process the HDR photos were all forgiven. It was a good phone. Until, that is, less than a year in, the battery was completely shot. It would power off when less than 40% and couldn’t last the trip from Melbourne airport to Melbourne city.

So, with a flagship phone well within the “reasonable quality” time that consumer law would dictate, I contacted Google after going through all the standard troubleshooting. Google agreed this was not normal and that the phone was defective. I was told that they would mail me a replacement, I could transfer my stuff over and then mail in the broken one. FANTASTIC!! This was soooo much better than the experience with the 5X.

Except that it wasn’t. A week later, I rang back to ask what was going on as I hadn’t received the replacement; it turns out Google had lied to me, I’d have to mail the phone to them and then another ten business days later I’d have a replacement. Errr…. no, I’ve been here before.

I rang the retailer, JB Hi-Fi; they said it would take them at least three weeks, which I told them was not acceptable nor a “reasonable timeframe” as dictated by consumer law.

So, with a bunch of travel imminent, I bought a big external USB-C battery and kept it constantly connected as without it the battery percentage went down faster than the minutes ticked over. I could sort it out once I was back from travel.

So, I’m back. In fact, I drove back from a weekend away and finally bit the bullet – I went to pick up a phone who’s manufacturer has a reputation of supporting their hardware.

I picked up an iPhone.

I figured I should write up how, why, my reasons, and experiences in switching phone platforms. I think my next post will be “Why iPhone and not a different Android”.

pwnm-sync: Synchronizing Patchwork and Notmuch

One of the core bits of infrastructure I use as a maintainer is Patchwork (I wrote about making it faster recently). Patchwork tracks patches sent to a mailing list, allowing me as a maintainer to track the state of them (New|Under Review|Changes Requested|Accepted etc), combine them into patch bundles, look at specific series, test results etc.

One of the core bits of software I use is my email client, notmuch. Most other mail clients are laughably slow and clunky, or just plain annoying for absorbing a torrent of mail and being able to deal with it or just plain ignore it but have it searchable locally.

You may think your mail client is better than notmuch, but you’re wrong.

A key feature of notmuch is tagging email. It doesn’t do the traditional “folders” but instead does tags (if you’ve used gmail, you’d be somewhat familiar).

One of my key work flows as a maintainer is looking at what patches are outstanding for a project, and then reviewing them. This should also be a core part of any contributor to a project too. You may think that a tag:unread and to:project-list@foo query would be enough, but that doesn’t correspond with what’s in patchwork.

So, I decided to make a tool that would add tags to messages in notmuch corresponding with the state of the patch in patchwork. This way, I could easily search for “patches marked as New in patchwork” (or Under Review or whatever) and see what I should be reviewing and looking at merging or commenting on.

Logically, this wouldn’t be that hard, just use the (new) Patchwork REST API to get the state of everything and issue the appropriate notmuch commands.

But just going one way isn’t that interesting, I wanted to be able to change the tags in notmuch and have them sync back up to Patchwork. So, I made that part of the tool too.

Introducing pwnm-sync: a tool to sync patchwork and notmuch.

notmuch-hello tag counts for pwnm-sync tagged
patches in patchwork
notmuch-hello tag counts for pwnm-sync tagged
patches in patchwork

With this tool I can easily see the patchwork state of any patch that I have in my notmuch database. For projects that I’m a maintainer on (i.e. can change the state of patches), If I update the patches of that email and run pwnm-sync again, it’ll update the state in patchwork.

I’ve been using this for a few weeks myself and it’s made my maintainer workflow significantly nicer.

It may also be useful to people who want to find what patches need some review.

The sync time is mostly dependent on how fast your patchwork instance is for API requests. Unfortunately, we need to make some improvements on the Patchwork side of things here, but a full sync of the above takes about 4 minutes for me. You can also add a –epoch option (with a date/time) to say “only fetch things from patchwork since that date” which makes things a lot quicker for incremental syncs. For me, I typically run it with an epoch of a couple of months ago, and that takes ~20-30 seconds to run. In this case, if you’ve locally updated a old patch, it will still sync that change up to patchwork.

Implementation Details

It’s a python3 script using the notmuch python bindings, the requests-futures module for asynchronous HTTP requests (so we can have the patchwork server assemble the next page of results while we process the previous one), and a local sqlite3 database to store state in so we can work out what changed locally / server side.

Getting it

Head to https://github.com/stewartsmith/pwnm-sync or just:

git clone https://github.com/stewartsmith/pwnm-sync.git

ccache and op-build

You may have heard of ccache (Compiler Cache) which saves you heaps of real world time when rebuilding a source tree that is rather similar to one you’ve recently built before. It’s really useful in buildroot based projects where you’re building similar trees, or have done a minor bump of some components.

In trying to find a commit which introduced a bug in op-build (OpenPOWER firmware), I noticed that hostboot wasn’t being built using ccache and we were always doing a full build. So, I started digging into it.

It turns out that a bunch of the perl scripts for parsing the Machine Readable Workbook XML in hostboot did a bunch of things like foreach $key (%hash) – which means that the code iterates over the items in hash order rather than an order that would produce predictable output such as “attribute name” or something. So… much messing with that later, I had hostboot generating the same output for the same input on every build.

Next step was to work out why I was still getting a lot of CCACHE misses. It turns out the default ccache size is 5GB. A full hostboot build uses around 7.1GB of that.

So, if building op-build with CCACHE, be sure to set both BR2_CCACHE=y in your config as well as something like BR2_CCACHE_INITIAL_SETUP="--max-size 20G"

Hopefully my patches hit hostboot and op-build soon.

How I do email (at home)

I thought I might write something up on how I’ve been doing email both at home and at work. I very much on purpose keep the two completely separate, and have slightly different use cases for both of them.

For work, I do not want mail on my phone. For personal mail, it turns out I do want this on my phone, which is currently an Android phone. Since my work and personal email is very separate, the volume of mail is really, really different. Personal mail is maybe a couple of dozen a day at most. Work is… orders of magnitude more.

Considering I generally prefer free software to non-free software, K9 Mail is the way I go on my phone. I have it set up to point at the IMAP and SMTP servers of my mail provider (FastMail). I also have a google account, and the gmail app works fine for the few bits of mail that go there instead of my regular account.

For my mail accounts, I do an INBOX ZERO like approach (in reality, I’m pretty much nowhere near zero, but today I learned I’m a lot closer than many colleagues). This means I read / respond / do / ignore mail and then move it to an ARCHIVE folder. K9 and Gmail both have the ability to do this easily, so it works well.

Additionally though, I don’t want to care about limits on storage (i.e. expire mail from the server after X days), nor do I want to rely on “the cloud” to be the only copy of things. I also don’t want to have to upload any of past mail I may be keeping around. I also generally prefer to use notmuch as a mail client on a computer.

For those not familiar with notmuch, it does tags on mail in Maildir, is extremely fast and can actually cope with a quantity of mail. It also has this “archive”/INBOX ZERO workflow which I like.

In order to get mail from FastMail and Gmail onto a machine, I use offlineimap. An important thing to do is to set “status_backend = sqlite” for each Account. It turns out I first hacked on sqlite for offlineimap status a bit over ten years ago – time flies. For each Account I also set presynchook = ~/Maildir/maildir-notmuch-presync (below) and a postsynchook = notmuch new. The presynchook is run before we sync, and its job is to move files around based on the tags in notmuch and the postsynchook lets notmuch catch any new mail that’s been fetched.

My maildir-notmuch-presync hook script is:

#!/bin/bash
notmuch search --output=files not tag:inbox and folder:fastmail/INBOX|xargs -I'{}' mv '{}' "$HOME/Maildir/INBOX/fastmail/Archive/cur/"

notmuch search --output=files folder:fastmail/INBOX and tag:spam |xargs -I'{}' mv '{}' "$HOME/Maildir/INBOX/fastmail/Spam/cur/"
ARCHIVE_DIR=$HOME/Maildir/INBOX/`date +"%Y%m"`/cur/
mkdir -p $ARCHIVE_DIR
notmuch search --output=files folder:fastmail/Archive and date:..90d and not tag:flagged | xargs -I'{}' mv '{}' "$ARCHIVE_DIR"

# Gmail
notmuch search --output=files not tag:inbox and folder:gmail/INBOX|grep 'INBOX/gmail/INBOX/' | xargs -I'{}' rm '{}'
notmuch search --output=files folder:gmail/INBOX and tag:spam |xargs -I'{}' mv '{}' "$HOME/Maildir/INBOX/gmail/[Gmail].Spam/cur/"

So This keeps 90 days of mail on the fastmail server, and archives older mail off into month based archive dirs. This is simply to keep directory sizes not too large, you could put everything in one directory… but at some point that gets a bit silly.

I don’t think this is all the most optimal setup I could have, but it does let me read and answer mail on my phone and desktop (as well as use a web client if I want to). There is a bit of needless copying of messages by offlineimap under certain circumstances, but I don’t get enough personal mail for it to be a problem.

Installing Windows on a USB key

For some unknown reason, the Windows installer doesn’t let you install to a USB key. Luckily, there’s a simple workaround. It turns out that only the very first step of installation cares about that. So, if you can fool it (say, by running in qemu), you can have a USB key with a Windows install rather than having to dual boot on your hard disk (e.g. if you run Linux and want all that fast in-built SSD space for Linux)

  1. Download the Windows Installer: https://www.microsoft.com/en-au/software-download/windows10ISO
  2. Start the installer in a VM, with the USB key passed through to the VM as the hard disk (or use a disk image the same size as your USB key for transfer with a utility such as ‘dd’ later). e.g. do:
    qemu-img create -f raw win-installed.img 50G
    
    qemu-system-x86_64 --enable-kvm -m 8G -cdrom Downloads/Win10_1709_English_x64.iso -hda win-installed.img -boot d
  3. At the first reboot of the installer, instead of letting it boot, stop the VM. You are going to copy the install at this state to the USB key.
  4. Boot from the USB key, go through the rest of the installer. You’re done!

Updating Intel Management Engine firmware on a Lenovo without a Windows Install

This is how I updated my Intel ME firmware on my Lenovo X1 Carbon Gen 4 (reports say this also has worked for Gen5 machines). These instructions are pretty strongly inspired by https://news.ycombinator.com/item?id=15744152

Why? Intel security advisory and CVE-2017-5705, CVE-2017-5708, CVE-2017-5711, and CVE-2017-5712 should be reason enough.

You will need:

  • To download about 3.5GB of stuff
  • A USB key
  • Linux installed
  • WINE or a Windows box to run two executables (because self extracting archives are a thing on Windows apparently)
  • A bit of technical know-how. A shell prompt shouldn’t scare you too hard.

Steps:

  1. Go to https://www.microsoft.com/en-au/software-download/windows10ISO and download the 32-bit ISO.
  2. Mount the ISO as a loopback device (e.g. by right clicking and choosing to mount, or by doing ‘sudo mount -o loop,ro file.iso /mnt’
  3. Go to Lenovo web site for Drivers & Software for your laptop, under Chipset, there’s ME Firmware and Software downloads You will need both. It looks like this:
  4. Run both exe files with WINE or on a windows box to extract the archives, you do not need to run the installers at the end.
  5. you now need to extract the management engine drivers. You can do this in  ~/.wine/drive_c/DRIVERS/WIN/AMT, with “cabextract SetupME.exe” or (as suggested in the comments) you can use the innoextract utility (from linux) to extract them (a quick check shows this to work)
  6. Save off HECI_REL folder, it’s the only extracted thing you’ll need.
  7. Go and install https://wimlib.net/ – we’re going to use it to create the boot disk. (it may be packaged for your distro).
    If you don’t have the path /usr/lib/syslinux/modules/bios on your system but you do have /usr/share/syslinux/modules/bios – you will need to change a bit of the file programs/mkwinpeimg.in to point to the /usr/share locations rather than /usr/lib before you install wimlib. This probably isn’t needed if you’re installing from packages, but may be requried if you’re on, say, Fedora.
  8. Copy ~/.wine/drive_c/DRIVERS to a new folder, e.g. “winpe_overlay” (or copy from the Windows box you extracted things on)
  9. Use mkwinpeimg to create the boot disk, pointing it to the mounted Windows 10 installer and the “winpe_overlay”:
    mkwinpeimg -W /path/to/mounted/windows10-32bit-installer/ -O winpe_overlay disk.img
  10. Use ‘dd’ to write it to your USB key
  11. Reboot, go into BIOS and turn Secure Boot OFF, Legacy BIOS ON, and AMT ON.
  12. Boot off the USB disk you created.
  13. In the command prompt of the booted WinPE environment, run the following to start the update:
    cd \
    cd HECI_REL\win10
    drvload heci.inf
    cd \
    cd win\me
    MEUpdate.cmd

    It should look something like this:

  14. Reboot, go back into BIOS and change your settings back to how you started.

op-test-framework: Let’s break the console!

One of the things I’ve been working on fairly quietly is the test suite for OpenPOWER firmware: op-test-framework. I’ve approach things I’m hacking on from the goal of “when I merge patches into skiboot, can I be confident that I haven’t merged something that’s broken existing functionality?”

By testing host firmware, we incidentally (as well as on purpose) test a whole bunch of BMC functionality. One bit of functionality we rely on a lot is the host “serial” console. Typically, this is exposed to the user over IPMI Serial Over LAN (SOL), or on OpenBMC it’s also exposed as something you can ssh to (which proves to be both faster and more reliable than IPMI, not to mention there’s some remote semblance of security).

When running through some tests, I noticed something pretty odd, it appeared as though we were sometimes missing some console output on larger IOs. This usually isn’t a problem as when we’re using expect(1) (or the python equivalent pexpect) we end up having all sorts of delays here there and everywhere to work around all the terrible things you hope you never learn. So… how could I test that? Well.. what about checking the output of something like dd if=/dev/zero bs=1024 count=16|hexdump -C to see if we get the full output?

Time to add a test to op-test-framework! Adding such a test is pretty easy. If we look at the source of the test I added, we can see what happens (source here).

class Console():
    bs = 1024
    count = 8
    def setUp(self):
        conf = OpTestConfiguration.conf
        self.bmc = conf.bmc()
        self.system = conf.system()

    def runTest(self):
        self.system.goto_state(OpSystemState.PETITBOOT_SHELL)
        console = self.bmc.get_host_console()
        self.system.host_console_unique_prompt()
        bs = self.bs
        count = self.count
        self.assertTrue( (bs*count)%16 == 0, "Bug in test writer. Must be multiple of 16 bytes: bs %u count %u / 16 = %u" % (bs, count, (bs*count)%16))
        try:
            zeros = console.run_command("dd if=/dev/zero bs=%u count=%u|hexdump -C -v" % (bs, count), timeout=120)
        except CommandFailed as cf:
            self.assertEqual(cf.exitcode, 0)
        self.assertTrue( len(zeros) == 3+(count*bs)/16, "Unexpected length of zeros %u" % (len(zeros)))

First thing you’ll notice is that this looks like a Python unittest. It’s because it is. The unittest infrastructure was a path of least resistance, so we started with it. This class isn’t the one that’s actually run, we do a little bit of inheritance magic in order to run the same test with different parameters (see https://github.com/open-power/op-test-framework/blob/6c74fb0fb0993ae8ae1a7aa62ec58e57c0080686/testcases/Console.py#L50)

class Console8k(Console, unittest.TestCase):
    bs = 1024
    count = 8

class Console16k(Console, unittest.TestCase):
    bs = 1024
    count = 16

class Console32k(Console, unittest.TestCase):
    bs = 1024
    count = 32

The setUp() function is pure boiler plate, we grab some objects from the configuration of the test run, namely information about the BMC and the system itself, so we can do things to both. The real magic happens in runTest().

op-test-framework tracks the state of the machine being tested across each test. This means that if we’re executing 101 tests in the petitboot shell, we don’t need to do 101 separate boots to petitboot. The self.system.goto_state(OpSystemState.PETITBOOT_SHELL) statement says “Please ensure the system is booted to the petitboot shell”. Other states include OFF (obvious) and OS, which is when the machine is booted to the OS.

The next two lines ensure we can run commands on the console (where console is IPMI Serial over LAN or other similar connection, such as the SSH console provided by OpenBMC):

console = self.bmc.get_host_console()
self.system.host_console_unique_prompt()

The host_console_unique_prompt() call is a bit ugly, and I’m hoping we fix the APIs so that this isn’t needed. Basically, it sets things up so that pexpect will work properly.

The bit that does the work is the try/except block along with the assertTrue. We don’t currently check that the content is all correct, we just check we got the right *amount* of content.

It turns out, this check is enough to reveal a bug that turns out to be deep in the core Linux TTY layer, and has caused Jeremy some amount of fun (for certain values of fun).

Want to know more about how the console works? Jeremy blogged on it.

Fedora 25 + Lenovo X1 Carbon 4th Gen + OneLink+ Dock

As of May 29th 2017, if you want to do something crazy like use *both* ports of the OneLink+ dock to use monitors that aren’t 640×480 (but aren’t 4k), you’re going to need a 4.11 kernel, as everything else (for example 4.10.17, which is the latest in Fedora 25 at time of writing) will end you in a world of horrible, horrible pain.

To install, run this:

sudo dnf install \
https://kojipkgs.fedoraproject.org//packages/kernel/4.11.3/200.fc25/x86_64/kernel-4.11.3-200.fc25.x86_64.rpm \
https://kojipkgs.fedoraproject.org//packages/kernel/4.11.3/200.fc25/x86_64/kernel-core-4.11.3-200.fc25.x86_64.rpm \
https://kojipkgs.fedoraproject.org//packages/kernel/4.11.3/200.fc25/x86_64/kernel-cross-headers-4.11.3-200.fc25.x86_64.rpm \
https://kojipkgs.fedoraproject.org//packages/kernel/4.11.3/200.fc25/x86_64/kernel-devel-4.11.3-200.fc25.x86_64.rpm \
https://kojipkgs.fedoraproject.org//packages/kernel/4.11.3/200.fc25/x86_64/kernel-modules-4.11.3-200.fc25.x86_64.rpm \
https://kojipkgs.fedoraproject.org//packages/kernel/4.11.3/200.fc25/x86_64/kernel-tools-4.11.3-200.fc25.x86_64.rpm \
https://kojipkgs.fedoraproject.org//packages/kernel/4.11.3/200.fc25/x86_64/kernel-tools-libs-4.11.3-200.fc25.x86_64.rpm \
https://kojipkgs.fedoraproject.org//packages/kernel/4.11.3/200.fc25/x86_64/perf-4.11.3-200.fc25.x86_64.rpm

This grabs a kernel that’s sitting in testing and isn’t yet in the main repositories. However, I can now see things on monitors, rather than 0 to 1 monitor (most often 0). You can also dock/undock and everything doesn’t crash in a pile of fail.

I remember a time when you could fairly reliably buy Intel hardware and have it “just work” with the latest distros. It’s unfortunate that this is no longer the case, and it’s more of a case of “wait six months and you’ll still have problems”.

Urgh.

(at least Wayland and X were bug for bug compatible?)

j-core + Numato Spartan 6 board + Fedora 25

A couple of changes to http://j-core.org/#download_bitstream made it easy for me to get going:

  • In order to make ModemManager not try to think it’s a “modem”, create /etc/udev/rules.d/52-numato.rules with the following content:
    # Make ModemManager ignore Numato FPGA board
    ATTRS{idVendor}=="2a19", ATTRS{idProduct}=="1002", ENV{ID_MM_DEVICE_IGNORE}="1"
  • You will need to install python3-pyserial and minicom
  • The minicom command line i used was:
    sudo stty -F /dev/ttyACM0 -crtscts && minicom -b 115200 -D /dev/ttyACM0

and along with the instructions on j-core.org, I got it to load a known good build.

Books referenced in my Organizational Change talk at LCA2017

All of these are available as Kindle books, but I’m sure you can get 3D copies too:

The Five Dysfunctions of a Team: A Leadership Fable by Patrick M. Lencioni
Leading Change by John P. Kotter
Who Says Elephants Can’t Dance? Louis V. Gerstner Jr.
Nonviolent Communication: A language of Life by Marshall B. Rosenberg and Arun Gandhi

Fast Reset, Trusted Boot and the security of /sbin/reboot

In OpenPOWER land, we’ve been doing some work on Secure and Trusted Boot while at the same time doing some work on what we call fast-reset (or fast-reboot, depending on exactly what mood someone was in at any particular time…. we should start being a bit more consistent).

The basic idea for fast-reset is that when the OS calls OPAL reboot, we gather all the threads in the system using a combination of patching the reset vector and soft-resetting them, then cleanup a few bits of hardware (we do re-probe PCIe for example), and reload & restart the bootloader (petitboot).

What this means is that typing “reboot” on the command line goes from a ~90-120+ second affair (through firmware to petitboot, linux distros still take ages to shut themselves down) down to about a 20 second affair (to petitboot).

If you’re running a (very) recent skiboot, you can enable it with a special hidden NVRAM configuration option (although we’ll likely enable it by default pretty soon, it’s proving remarkably solid). If you want to know what that NVRAM option is… Use the source, Luke! (or git history, but I’ve yet to see a neat Star Wars reference referring to git commit logs).

So, there’s nothing like a demo. Here’s a demo with Ubuntu running off an NVMe drive on an IBM S822LC for HPC (otherwise known as Minsky or Garrison) which was running the HTX hardware exerciser, through fast-reboot back into Petitboot and then booting into Ubuntu and auto-starting the exerciser (HTX) again.

Apart from being stupidly quick when compared to a full IPL (Initial Program Load – i.e. boot), since we’re not rebooting out of band, we have no way to reset the TPM, so if you’re measuring boot, each subsequent fast-reset will result in a different set of measurements.

This may be slightly confusing, but it’s not really a problem. You see, if a machine is compromised, there’s nothing stopping me replacing /sbin/reboot with something that just prints things to the console that look like your machine rebooted but in fact left my rootkit running. Indeed, fast-reset and a full IPL should measure different values in the TPM.

It also means that if you ever want to re-establish trust in your OS, never do a reboot from the host – always reboot out of band (e.g. from a BMC). This, of course, means you’re trusting your BMC to not be compromised, which I wouldn’t necessarily do if you suspect your host has been.

Failed Retro emulation attempts

For reasons that should escape everybody, I went back and looked at some old Operating Systems a little while ago: OS/2 Warp, Windows 3.11 and Microsoft Chicago. So, I went on a little adventure this weekend, largely in failure though.

Windows NT 3.51

This was the first version (err… no, second I think) of Windows NT that I ever used.

Lesson 1: qemu doesn’t expose a SCSI adapter that isn’t virtio-scsi (and I have a feeling there aren’t Windows NT 3.51 installer driver floppies for virtio-scsi)

screenshot_winnt3-1_2016-10-29_191707Lesson 2: OMG I’m so glad I don’t have to wait for things to be read off floppy disks anymore:

screenshot_winnt3-51_2016-10-29_193833Lesson 3: I’d forgotten that the Windows directory on NT 3.51 was different to every other Windows NT version, being \WINNT35

screenshot_winnt3-51_2016-10-29_194040screenshot_winnt3-51_2016-10-29_194139Lesson 3: Yeah, sometimes there’s just fail.

screenshot_winnt3-51_2016-10-29_194147

Windows NT 4.0

This brought the UI of Windows 95 to Windows NT. It was a thing. It required a fairly beefy PC for the day, but it could use two CPUs if you were that amazingly rich (dual Pentium Pro was a thing)

Lesson 1: Windows NT 4 does not like 8GB disks. My idea of “creating a small disk for a VM for an old OS as it probably won’t work well with a 20GB disk” needs to be adjusted. I’m writing this on a system with 8 times more RAM than what I ended up using for a disk for Windows NT 4.

screenshot_winnt4-0_2016-10-29_192840But hey, back to \WINNT rather than \WINNT35 or \WINDOWS

screenshot_winnt4-0_2016-10-29_192937

Lesson 2: Sometimes, full system emulation turns out to be a better idea:

screenshot_winnt4-0_2016-10-29_192418screenshot_winnt4-0_2016-10-29_192304Lesson 3: Remember when Windows couldn’t actually format NTFS in the installer and it installed to FAT and then converted to NTFS? No? Well, aren’t you lucky.

screenshot_winnt4-0_2016-10-29_193102screenshot_winnt4-0_2016-10-29_193235Apple Rhapsody DR2

Before there was MacOS X, there was a project called Rhapsody. This was to take NeXTStep (from NeXT, which Apple bought to get both NeXTStep and Steve Jobs as every internal “let’s replace the aging MacOS” project had utterly failed for the past ten years). Rhapsody was not going to be backwards compatible until everybody said that was a terrible idea and the Blue Box was added (known as Classic) – basically, a para-virtualized VM running the old MacOS 9.

Anyway, for the first two developer releases, it was also available on x86 (not just PowerPC). This was probably because a PowerPC port to Macs was a lot newer than the x86 port.

So, I dusted off the (virtual) Boot and Driver floppies and fired up qemu…..

screenshot_rhapsodydr2_2016-10-29_172732Yeah, MacOS X got a better installer…

screenshot_rhapsodydr2_2016-10-29_173227Hopeful!

screenshot_rhapsodydr2_2016-10-29_182218This was after I decided that using KVM was a bad Idea:

screenshot_rhapsodydr2_2016-10-29_172143

screenshot_rhapsodydr2_2016-10-29_173333Nope… and this is where we stop. There seems to be some issue with ATA drivers? I honestly can’t be bothered to debug it (although… for the PowerPC version… maybe).

MacOS 9.2

Well.. this goes a lot better now thanks to a whole bunch of patches hitting upstream Qemu recently (thanks Ben!)

screenshot-from-2016-10-29-20-37-24screenshot-from-2016-10-29-20-42-10Yeah, I was kind of tempted to set up Outlook Express to read my email…. But running MacOS 9 was way too successful, so I had to stop there :)

Microsoft Chicago – retro in qemu!

So, way back when (sometime in the early 1990s) there was Windows 3.11 and times were… for Workgroups. There was this Windows NT thing, this OS/2 thing and something brewing at Microsoft to attempt to make the PC less… well, bloody awful for a user.

Again, thanks to abandonware sites, it’s possible now to try out very early builds of Microsoft Chicago – what would become Windows 95. With the earliest build I could find (build 56), I set to work. The installer worked from an existing Windows 3.11 install.

I ended up using full system emulation rather than normal qemu later on, as things, well, booted in full emulation and didn’t otherwise (I was building from qemu master… so it could have actually been a bug fix).

chicago-launch-setupMmmm… Windows 3.11 File Manager, the fact that I can still use this is a testament to something, possibly too much time with Windows 3.11.

chicago-welcome-setupchicago-setupUnfortunately, I didn’t have the Plus Pack components (remember Microsoft Plus! ?- yes, the exclamation mark was part of the product, it was the 1990s.) and I’m not sure if they even would have existed back then (but the installer did ask).

chicago-install-dirObviously if you were testing Chicago, you probably did not want to upgrade your working Windows install if this was a computer you at all cared about. I installed into C:\CHICAGO because, well – how could I not!

chicago-installingThe installation went fairly quickly – after all, this isn’t a real 386 PC and it doesn’t have of-the-era disks – everything was likely just in the linux page cache.

chicago-install-networkI didn’t really try to get network going, it may not have been fully baked in this build, or maybe just not really baked in this copy of it, but the installer there looks a bit familiar, but not like the Windows 95 one – maybe more like NT 3.1/3.51 ?

But at the end… it installed and it was time to reboot into Chicago:
chicago-bootSo… this is what Windows 95 looked like during development back in July 1993 – nearly exactly two years before release. There’s some Windows logos that appear/disappear around the place, which are arguably much cooler than the eventual Windows 95 boot screen animation. The first boot experience was kind of interesting too:
Screenshot from 2016-08-07 20-57-00Luckily, there was nothing restricting the beta site ID or anything. I just entered the number 1, and was then told it needed to be 6 digits – so beta site ID 123456 it is! The desktop is obviously different both from Windows 3.x and what ended up in Windows 95.

Screenshot from 2016-08-07 20-57-48Those who remember Windows 3.1 may remember Dr Watson as an actual thing you could run, but it was part of the whole diagnostics infrastructure in Windows, and here (as you can see), it runs by default. More odd is the “Switch To Chicago” task (which does nothing if opened) and “Tracker”. My guess is that the “Switch to Chicago” is the product of some internal thing for launching the new UI. I have no ideawhat the “Tracker” is, but I think I found a clue in the “Find File” app:

Screenshot from 2016-08-13 14-10-10Not only can you search with regular expressions, but there’s “Containing text”, could it be indexing? No, it totally isn’t. It’s all about tracking/reporting problems:

Screenshot from 2016-08-13 14-15-19Well, that wasn’t as exciting as I was hoping for (after all, weren’t there interesting database like file systems being researched at Microsoft in the early 1990s?). It’s about here I should show the obligatory About box:
Screenshot from 2016-08-07 20-58-10It’s… not polished, and there’s certainly that feel throughout the OS, it’s not yet polished – and two years from release: that’s likely fair enough. Speaking of not perfect:

Screenshot from 2016-08-07 20-59-03When something does crash, it asks you to describe what went wrong, i.e. provide a Clue for Dr. Watson:

Screenshot from 2016-08-13 12-09-22

But, most importantly, Solitaire is present! You can browse the Programs folder and head into Games and play it! One odd tihng is that applications have two >> at the end, and there’s a “Parent Folder” entry too.

Screenshot from 2016-08-13 12-01-24Solitair itself? Just as I remember.

Screenshot from 2016-08-07 21-21-27Notably, what is missing is anything like the Start menu, which is probably the key UI element introduced in Windows 95 that’s still with us today. Instead, you have this:

Screenshot from 2016-08-13 11-55-15That’s about the least exciting Windows menu possible. There’s the eye menu too, which is this:

Screenshot from 2016-08-13 11-56-12More unfinished things are found in the “File cabinet”, such as properties for anything:
Screenshot from 2016-08-13 12-02-00But let’s jump into Control Panels, which I managed to get to by heading to C:\CHICAGO\Control.sys – which isn’t exactly obvious, but I think you can find it through Programs as well.Screenshot from 2016-08-13 12-02-41Screenshot from 2016-08-13 12-05-40The “Window Metrics” application is really interesting! It’s obvious that the UI was not solidified yet, that there was a lot of experimenting to do. This application lets you change all sorts of things about the UI:

Screenshot from 2016-08-13 12-05-57My guess is that this was used a lot internally to twiddle things to see what worked well.

Another unfinished thing? That familiar Properties for My Computer, which is actually “Advanced System Features” in the control panel, and from the [Sample Information] at the bottom left, it looks like we may not be getting information about the machine it’s running on.

Screenshot from 2016-08-13 12-06-39

You do get some information in the System control panel, but a lot of it is unfinished. It seems as if Microsoft was experimenting with a few ways to express information and modify settings.

Screenshot from 2016-08-13 12-07-13But check out this awesome picture of a hard disk for Virtual Memory:

Screenshot from 2016-08-13 12-07-47The presence of the 386 Enhanced control panel shows how close this build still was to Windows 3.1:

Screenshot from 2016-08-13 12-08-08At the same time, we see hints of things going 32 bit – check out the fact that we have both Clock and Clock32! Notepad, in its transition to 32bit, even dropped the pad and is just Note32!

Screenshot from 2016-08-13 12-11-10Well, that’s enough for today, time to shut down the machine:
Screenshot from 2016-08-13 12-15-45

Windows 3.11 nostalgia

Because OS/2 didn’t go so well… let’s try something I’m a lot more familiar with. To be honest, the last time I in earnest used Windows on the desktop was around 3.11, so I kind of know it back to front (fun fact: I’ve read the entire Windows 3.0 manual).

It turns out that once you have MS-DOS installed in qemu, installing Windows 3.11 is trivial. I didn’t even change any settings for Qemu, I just basically specced everything up to be very minimal (50MB RAM, 512mb disk).

win31-setupwin31-disk4win31-installedWindows 3.11 was not a fun time as soon as you had to do anything… nightmares of drivers, CONFIG.SYS and AUTOEXEC.BAT plague my mind. But hey, it’s damn fast on a modern processor.

OS/2 Warp Nostalgia

Thanks to the joys of abandonware websites, you can play with some interesting things from the 1990s and before. One of those things is OS/2 Warp. Now, I had a go at OS/2 sometime in the 1990s after being warned by a friend that it was “pretty much impossible” to get networking going. My experience of OS/2 then was not revolutionary… It was, well, something else on a PC that wasn’t that exciting and didn’t really add a huge amount over Windows.

Now, I’m nowhere near insane enough to try this on my actual computer, and I’ve managed to not accumulate any ancient PCs….

Luckily, qemu helps with an emulator! If you don’t set your CPU to Pentium (or possibly something one or two generations newer) then things don’t go well. Neither does a disk that by today’s standards would be considered beyond tiny. Also, if you dare to try to use an unpartitioned hard disk – OH MY are you in trouble.

Also, try to boot off “Disk 1” and you get this:
os2-wrong-floppyPossibly the most friendly error message ever! But, once you get going (by booting the Installation floppy)… you get to see this:

Screenshot from 2016-08-07 19-12-19and indeed, you are doing the time warp of Operating Systems right here. After a bit of fun, you end up in FDISK:

os2-installos2-1gb-too-muchWhy I can’t create a partition… WHO KNOWS. But, I tried again with a 750MB disk that already had a partition on it and…. FAIL. I think this one was due to partition type, so I tried again with partition type of 6 – plain FAT16, and not W95 FAT16 (LBA). Some memory is coming back to me of larger drives and LBA and nightmares…

But that worked!

warp4-installingos2-checkingThen, the OS/2 WARP boot screen… which seems to stick around for a long time…..

os2-install-2and maybe I could get networking….

os2-networkLadies and Gentlemen, the wonders of having to select DHCP:

os2-dhcpIt still asked me for some config, but I gleefully ignored it (because that must be safe, right!?) and then I needed to select a network adapter! Due to a poor choice on my part, I started with a rtl8139, which is conspicuously absent from this fine list of Token Ring adapters:

os2-tokenringand then, more installing……

os2-more-installingbefore finally rebooting into….

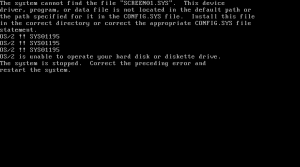
os2-failand that, is where I realized there was beer in the fridge and that was going to be a lot more fun.

Fuzzing Firmware – afl-fuzz + skiboot

In what is likely to be a series on how firmware makes some normal tools harder to use, first I’m going to look at american fuzzy lop – a tool for fuzz testing that if you’re not using then you most certainly have bugs it’ll find for you.

I first got interested in afl-fuzz during Erik de Castro Lopo’s excellent linux.conf.au 2016 in Geelong earlier this year: “Fuzz all the things!“. In a previous life, the Random Query Generator managed to find a heck of a lot of bugs in MySQL (and Drizzle). For randgen info, see Philip Stoev’s talk on it from way back in 2009, a recent (2014) blog post on how Tokutek uses it and some notes on how it was being used at Oracle from 2013. Basically, the randgen was a specialized fuzzer that (given a grammar) would randomly generate SQL queries, and then (if the server didn’t crash), compare the result to some other database server (e.g. your previous version).

The afl-fuzz fuzzer takes a different approach – it’s a much more generic fuzzer rather than a targeted tool. Also, while tools such as the random query generator are extremely powerful and find specialized bugs, they’re hard to get started with. A huge benefit of afl-fuzz is that it’s really, really simple to get started with.

Basically, if you have a binary that takes input on stdin or as a (relatively small) file, afl-fuzz will just work and find bugs for you – read the Quick Start Guide and you’ll be finding bugs in no time!

For firmware of course, we’re a little different than a simple command line program as, well, we aren’t one! Luckily though, we have unit tests. These are just standard binaries that include a bunch of firmware code and get run in user space as part of “make check”. Also, just like unit tests for any project, people do send me patches that break tests (which I reject).

Some of these tests act on data we get from a place – maybe reading other parts of firmware off PNOR or interacting with data structures we get from other bits of firmware. For testing this code, it can be relatively easy to (for the test), read these off disk.

For skiboot, there’s a data structure we get from the service processor on FSP machines called HDAT. Basically, it’s just like the device tree, but different. Because yet another binary format is always a good idea (yes, that is laced with a heavy dose of sarcasm). One of the steps in early boot is to parse the HDAT data structure and convert it to a device tree. Luckily, we structured our code so that creating a unit test that can run in userspace was relatively easy, we just needed to dump this data structure out from a running machine. You can see the test case here. Basically, hdat_to_dt is a binary that reads the HDAT structure out of a pair of files and prints out a device tree. One of the regression tests we have is that we always produce the same output from the same input.

So… throwing that into AFL yielded a couple of pretty simple bugs, especially around aborting out on invalid data (it’s better to exit the process with failure rather than hit an assert). Nothing too interesting here on my simple input file, but it does mean that our parsing code exits “gracefully” on invalid data.

Another utility we have is actually a userspace utility for accessing the gard records in the flash. A GARD record is a record of a piece of hardware that has been deconfigured due to a fault (or a suspected fault). Usually this utility operates on PNOR flash through /dev/mtd – but really what it’s doing is talking to the libflash library, that we also use inside skiboot (and on OpenBMC) to read/write from flash directly, via /dev/mtd or just from a file. The good news? I haven’t been able to crash this utility yet!

So I modified the pflash utility to read from a file to attempt to fuzz the partition reading code we have for the partitioning format that’s on PNOR. So far, no crashes – although to even get it going I did have to fix a bug in the file handling code in pflash, so that’s already a win!

But crashing bugs aren’t the only type of bugs – afl-fuzz has exposed several cases where we act on uninitialized data. How? Well, we run some test cases under valgrind! This is the joy of user space unit tests for firmware – valgrind becomes a tool that you can run! Unfortunately, these bugs have been sitting in my “todo” pile (which is, of course, incredibly long).

Where to next? Fuzzing the firmware calls themselves would be nice – although that’s going to require a targeted tool that knows about what to pass each of the calls. Another round of afl-fuzz running would also be good, I’ve fixed a bunch of the simple things and having a better set of starting input files would be great (and likely expose more bugs).

My linux.conf.au 2016 talk “Adventures in OpenPower Firmware” is up!

Thanks to the absolutely amazing efforts of the LCA video team, they’ve already (only a few days after I gave it) got the video from my linux.conf.au 2016 talk up!

Abstract

In mid 2014, IBM released the first POWER8 based systems with the new Free and Open Source OPAL firmware. Since then, several members of the OpenPower foundation have produced (or are currently producing) machines based on the POWER8 processor with the OPAL firmware.

This talk will cover the POWER8 chip with an open source firmware stack and how it all fits together.

We will walk through all of the firmware components and what they do, including the boot sequence from power being applied up to booting an operating system.

We’ll delve into:
– the time before you have RAM
– the time before you have thermal management
– the time before you have PCI
– runtime processor diagnostics and repair
– the bootloader (and extending it)
– building and flashing your own firmware
– using a simulator instead
– the firmware interface that Linux talks to
– device tree and OPAL calls
– fun in firmware QA and testing

View

Youtube: https://www.youtube.com/watch?v=a4XGvssR-ag

Download (webm): http://mirror.linux.org.au/linux.conf.au/2016/03_Wednesday/Costa_Hall/Adventures_in_OpenPower_Firmware.webm

An update on using Tor on Android

Back in 2012 I wrote a blog post on using Tor on Android which has proved quite popular over the years.

These days, there is the OrFox browser, which is from The Tor Project and is likely the current best way to browse the web through Tor on your Android device.

If you’re still using the custom setup Firefox, I’d recommend giving OrFox a try – it’s been working quite well for me.

FreeBSD on OpenPower

There’s been some work on porting FreeBSD over to run natively on top of OPAL, that is, on bare metal OpenPower machines (not just under KVM).

This is one of four possible things to run natively on an OPAL system:

  1. Linux
  2. hello_world (in skiboot tree)
  3. ppc64le_hello (as I wrote about yesterday)
  4. FreeBSD

It’s great to see that another fully featured OS is getting ported to POWER8 and OPAL. It’s not yet at a stage where you could say it was finished or anything (PCI support is pretty preliminary for example, and fancy things like disks and networking live on PCI).